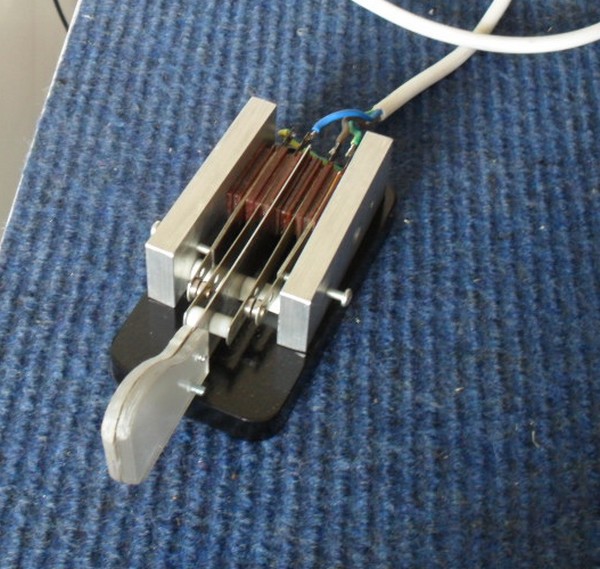
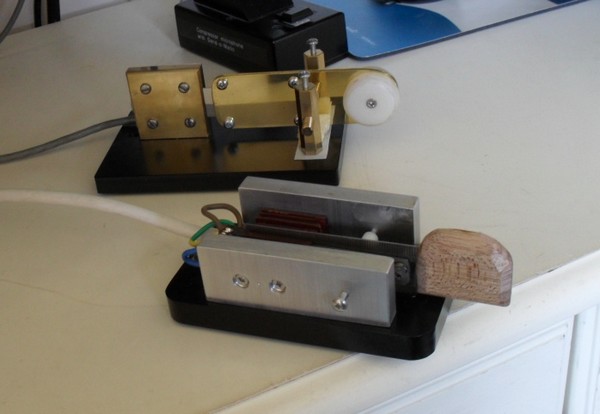
GM3VMB's keys.
Introduction.
I have operated with straight key and various electronic keyers for a long time. Generally I used the keyer in my radio with a home made twin touch paddle using two stainless teaspoons. Then I heard Martin, G4ZXN using a cootie sideswiper and was captivated by the rhythmic melody of his sending. In short I was hooked! I had to try it so I started making a few cootie keys and trying to learn the technique. Most of the keys were capable of acting as single paddles with a keyer - a safety net in case my cootie sending was no good. [GM3VMB].
Homebrew Table Knife Key.
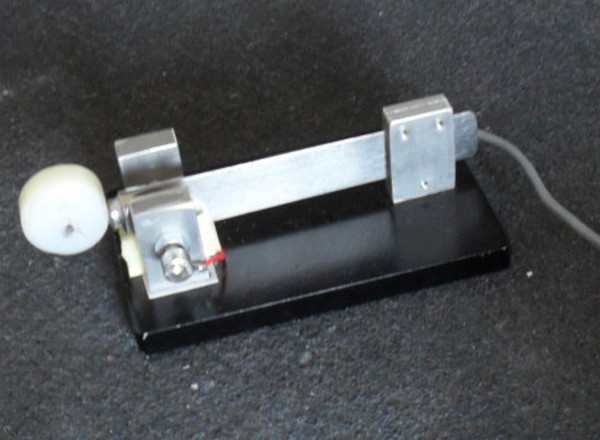 This was my first try. I used a stainless table knife as the blade, found a few bits of aluminium as an end support and as contact holders. It is all mounted on a piece of steel strip about 10mm thick. I mistakenly though it would be good to use stainless steel contacts which I made using two bolts. The key was very lively. I used a bit of foam plastic as a damper. It worked but contact bounce and scratch were terrible so a redesign was needed. Don't use stainless steel as contacts!
[GM3VMB].
Homebrew Brassy Single Lever Morse Paddle.
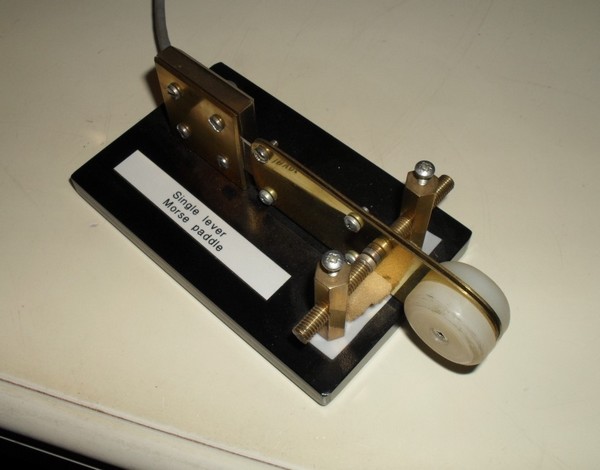 The next model used another stainless blade, this time from a palette knife. This time I had access to a friend's milling machine and some brass. The base is steel 120 x 80 x10mm. Learning from previous problems with contacts I used contacts from an old relay. This worked better than before and looked nicer but wasn't perfect.
[GM3VMB].
Homebrew Relay Key.
I decided to try a different approach and use the whole contact set from a PO3000 relay. The operating arm is a 150mm stainless steel ruler. Again a steel base with aluminium mountings. It does work but does not have the best feel. [GM3VMB].
Homebrew Sideswiper Touch Key.
 Decided to try a touch cootie some years ago. I was told that this was cheating by my guru - Martin, G4ZXN and to an extent he was right! I made the touch sensor using an Arduino micro but found it difficult to get a gap space between touches on either side spoon. To get round this I programmed the sensor to leave a small gap between opposite touches rather similar to the physical transition from side to side on a normal cootie. It does work though but not as easy to get the 'swing'. No contact bounce though!
[GM3VMB].
Homebrew Light Sabre Mk1 Key.
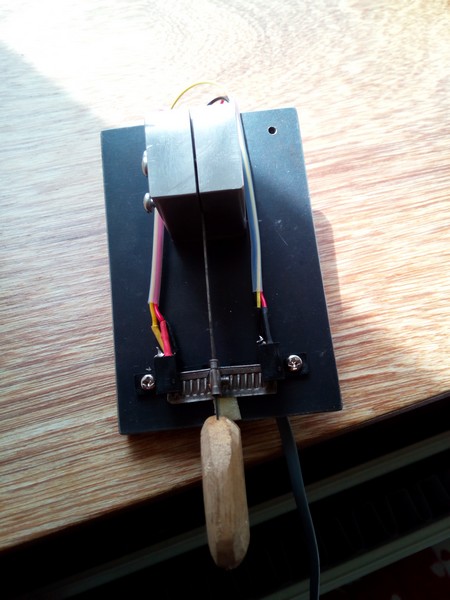
 Having struggled with contact bounce I tried a new approach. Bought some cheap slotted opto interrupters on eBay. Built a conventional hacksaw cootie but with an opto slot on each side of the arm and a metal flag that cut off the light until the arm was moved sideways. This has a steel base 100 x 70 x 10mm and an aluminium block to hold the blade. The electronics couldn't be simpler - a DC supply for the LEDs and the opto transistors across the rig key line. There are no stops but the key feels smooth and my code sending seemed to get a better swing. This has two contacts so could be used as a keyer single paddle in extremis.
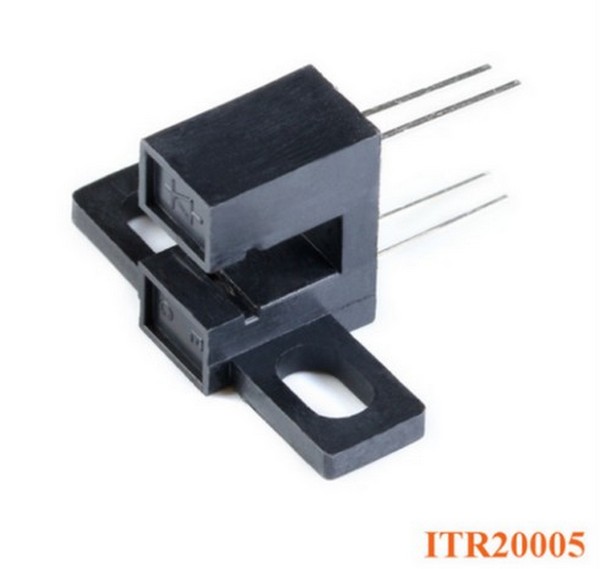
Here is a picture of the opto interrupter I used. Cheap from China. I didn't give a circuit because I just fed the LED from 12V via a 1KOhm resistor. Found, to my surprise that the transistor keyed my rig directly so no extra circuitry needed. With some radios a higher current buffer might be needed. I built one with a 555 and another with a CMOS chip but then found they were not needed in my case.
The key is named Light Sabre after I told a friend I was using an optical contact. Using a light beam appealed to him and he called it that as a joke. Named after the Star Wars Jedi weapon. I liked it so kept the name.
[GM3VMB].
Homebrew Light Sabre Mk2 Key.
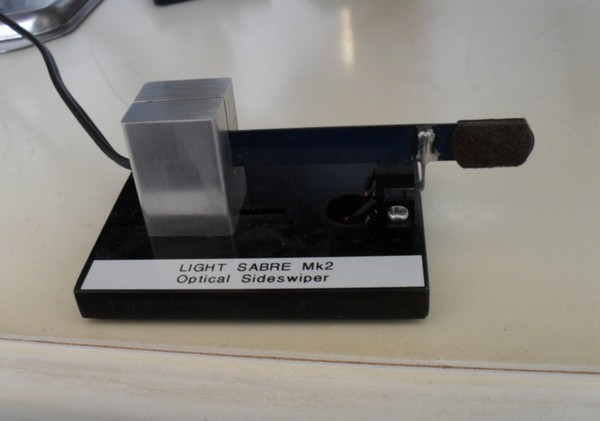 It seemed wasteful having two opto slots when one would do. This is a true cootie. It cannot be used as a paddle. Again on a steel base 90 x 70 x 10 and I did get adventurous - instead of painting the base I 'blued' it to get the same finish as on a gun. A good friend helped by milling a slot in the base so the aluminium support block could be adjusted to alter the length and therefore tension of the hacksaw blade arm. I soldered the stainless interrupter 'flag' to the arm so it sits in the opto slot. 'Gap' setting (there really is no gap!) is by filing the flag to a fairly thin size so small movements 'make' the contact. Careful adjustment of this and the tension and the key suddenly felt right. Unfortunately my spares box and engineering skills fell short of decent finger pieces so there could be improvements. However, this key feels great. Reports seem to suggest it sounds fine too.
[GM3VMB].
