PA3BYW's keys.
Introduction.
 About 25 years ago I was an very active CW operator. Here in the Netherlands we worked a lot on 3553 KHz. I passed my CW exam in 1981 and since then I was hooked to Morse code.
I loved the rhythm of it and the magic of the dits and dashes in the noise. Just like music!
I usually used the homemade elbug or my old Junker key. Some people could send QRQ by hand and I never understood how they did that with a straight key?! Later I understood that they were sending with a double speed or sideswiper key.
In the following years I had not much time for my radio hobby but ever now and then I worked a station.
[PA3BYW].
Homebrew S-Wing Sideswiper.
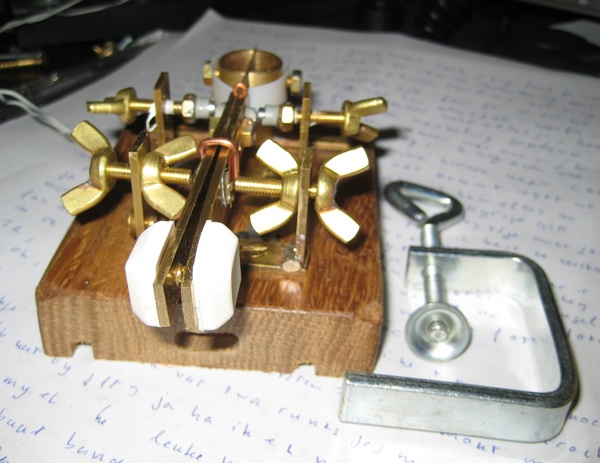 The last years I re-discovered my old radio shack and of course my old keys. On YouTube I saw some video's by Sandy, G0VQW using his sideswipers.
I then thought: that is something I want to do as well. So Sandy thank you very much for your interesting video's!
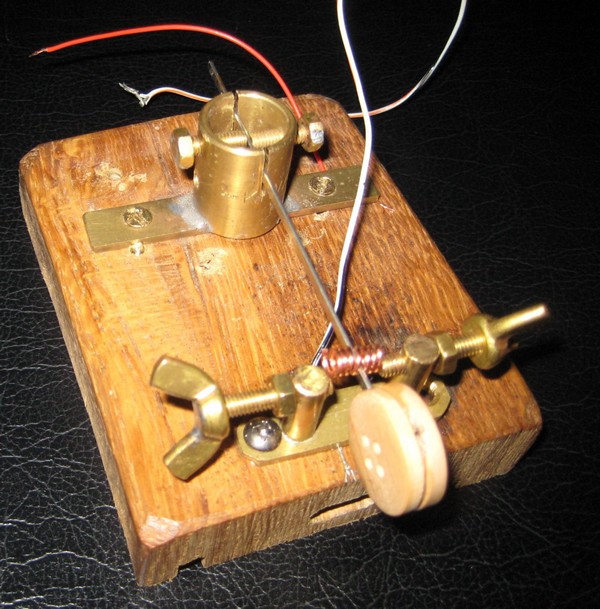
But I had no Cootie key so I had to make something to work with. I made a very simple (and ugly..) key using brass strips and wing screws for adjusting the contacts.
I heard that some people had a 'nickname' for their cootie so I called mine: "S-wing" referring to the wing screws.
This is recent history: all this took place about 4 weeks ago. I first practiced an afternoon before coming on the air. My first QSO's my sending was not very good but I am getting used to it now. It is just like learning to play guitar (like I do).
I was not very pleased with the looking of the key so I am making another one now which will look better (I hope).
[PA3BYW].
Homebrew De Kaai Sideswiper.
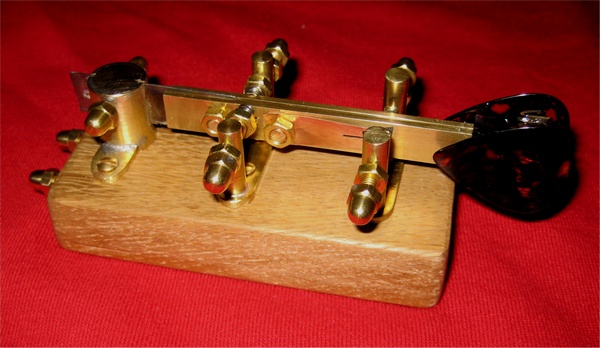 The base is made of oak wood (100x50x20 mm). I putted some polishing wax on it.
I am using a custom made brass clamp witch can secure the key to the table. In the front of the base there is a hole for the clamp. This means, that I can't rest my arm on the table but I don't care.
All parts are made of brass witch I bought in the local hardware store. The central pillar actually is a brass water pipe fitting witch is modified for the purpose.
It was a lot of soldering, sawing and filing.... The spring blade is a piece of an old hacksaw as you can see.
The length of the lever is about 100 mm. The finger pieces are guitar picks (distance 14 mm). This time I used tension springs instead of magnets. This far I am satisfied with it.
The contacts came from an old telephone from my junkbox.
I'm damping the contacts with a small piece of rubber, witch gives me a very quiet key and a smooth feeling. The contacts on the backside are for connecting the wires. They were connected from the inside by drilling a hole in the wood. So you can't see any ugly holes in the bottom.
Well about the nickname: Kees, PA3DEB gave me the suggestion to call it "the Brass-key", because I play the flugelhorn in a brass band, but I rather give it a short Frisian name. So here it is: "de kaai" (tr: the key).
[PA3BYW].
Homebrew Travel Cootie.
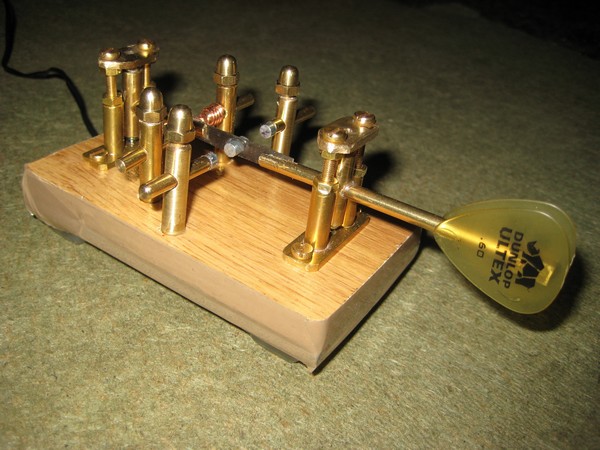
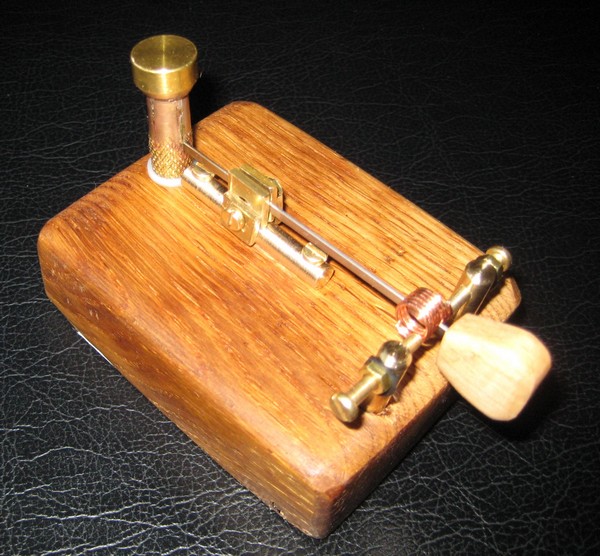
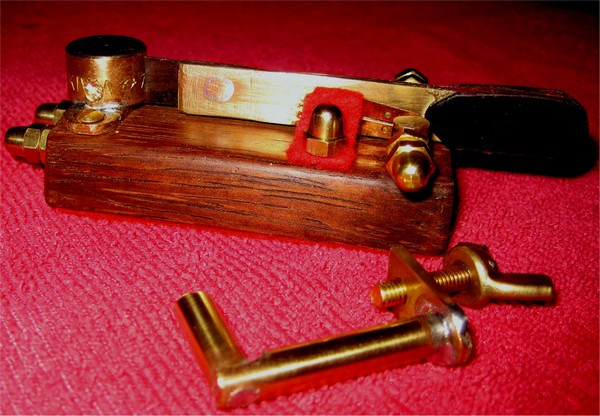 Well it's a homebrew again. This time I wanted to have a very small key which I can use during my holidays and also in the shack. The base is made of meranti wood (I believe) measures: 70x35 mm. All parts are brass. The lever is a small brass strip of 70 mm. The leaf spring is a modified piece of an old hacksaw.
The finger pieces are guitar picks witch were trimmed to become a small key. The contacts came from an old telephone from my junkbox. To prevent excessive vibration I mounted a small piece of baize (felt) beside the lever. The wire connection is on the backside. In the front you see the custom made clamp which can be used to secure the cootie to the table.
[PA3BYW].
Homebrew Combikey.
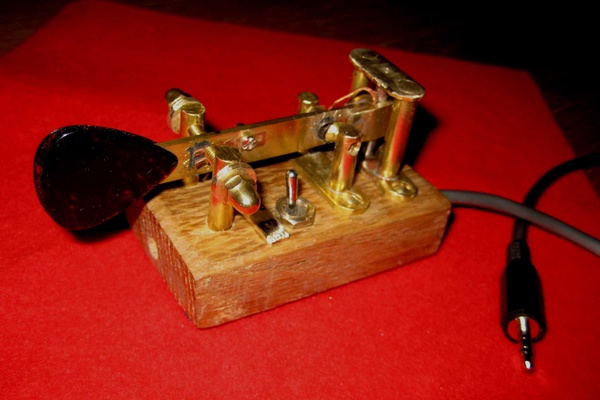 Here is another homebrew key: the "Combikey".
I used brass again. In the pivot point I used a small ball-bearing which I found in my junkbox. The contacts are from an old bipolar relay. They are damped by a small piece of rubber. The fingerpieces are guitar picks.
With a small switch I can use this key as a sideswiper key or as a single lever elbug. For elbug use I make a very small contact gap and for sideswiper use I adjust the contacts a little wider.
[PA3BYW].
Homebrew CootieBug.
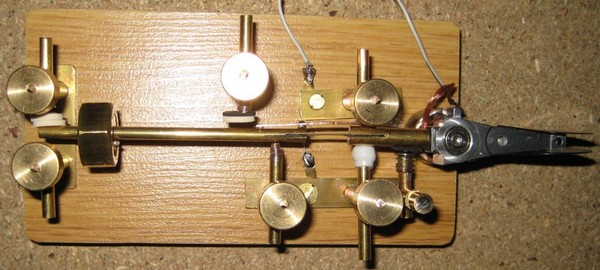
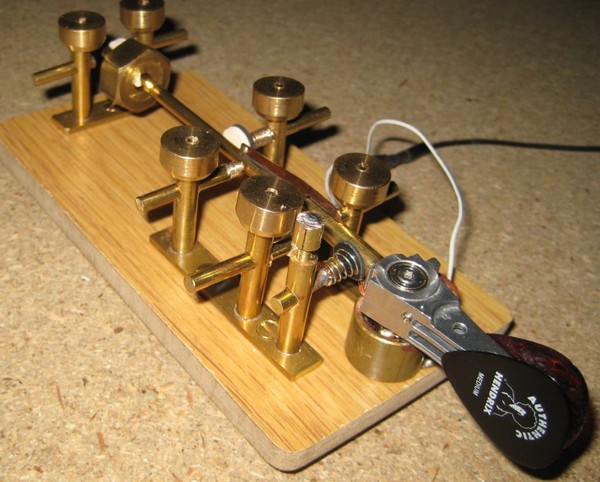 My new key is designed as a bug which can be used as a sideswiper as well.
For that purpose I wanted to have flexible contacts for Dot and Dash which should be placed on about the same position beside the lever.
Therefore the Dash contact is not placed on the short lever at the hand side of the key but beside the pendulum.
The Dot contact is not placed on the moving pendulum but on a fixed position on the base.
The Dot contact is conical for the right flexibility and hand wounded. I used a piece of phosphor bronze from the winding of an old guitar string (low E string). So never waste old stuff..
The pendulum has to be damped on its resting position. Therefore I used two dampers, one at the end of the pendulum and one next to the Dash contact. These dampers again are mounted on a spring.
In the pivot point I used an ball bearing which came from an old computer hard disk. On this short lever I glued two guitar picks. The one on the left is an authentic Jimmy Hendrix pick..
On this piece of computer hardware I mounted a piece of brass rod (6mm). In this rod I mounted a piece of baby iron saw, which is connected to the pendulum (5mm rod). I first squeezed the spring blade into the slits, I sawed there, and later glued it with superglue. The Dash contact is made with the pendulum resting on the damper and by a slide bending of the spring blade.
The weight on the pendulum is a brass nut, which is filled with a piece of brass bolt and then soldered together. In the middle there is a small hole with a small piece of plastic to fit the pendulum lever perfectly. So I don't have to use a screw to secure the weight. With this weight the bug is able to send from 20-35 wpm.
The pin on the short lever for getting the pendulum to motion needs to be electrical isolated, as well as the tension spring on this lever.
At the end of the pendulum there is a second pin which can lock the pendulum more or less. With this locked pendulum and a good contact adjustment I use the key as a sideswiper. The motion pin on the short lever has to be set in a free position then.
For bug mode, I adjust the swing of the pendulum to a minimum to avoid bouncing contacts. This small motion gives me a better readable CW (I hope). With the bending of the dash contact the dashes are much smoother. Many bug operators have choppy dashes, in my opinion due to the rigid dash contacts used in most bugs.
The setscrews for all adjusting points have large brass knobs. In the screw-thread of the pillars I have putted a small piece of nylon wire, so that the setscrew does not damage the adjusting pins.
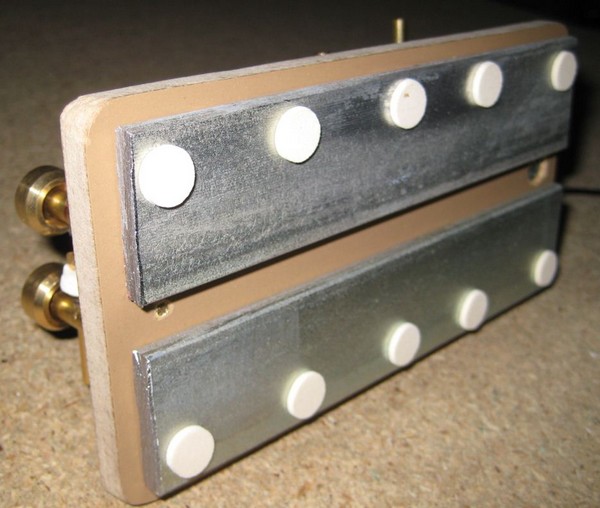
The base is a piece of floor laminate. On the bottom side of the base I glued two iron strips (140x30x6mm) to become more weight.
The CootieBug is an easy to operate key, both in bug-mode and in sideswiper-mode. Adjusting the contacts is a matter of trial and error; the Dot contact has a certain sweet spot.
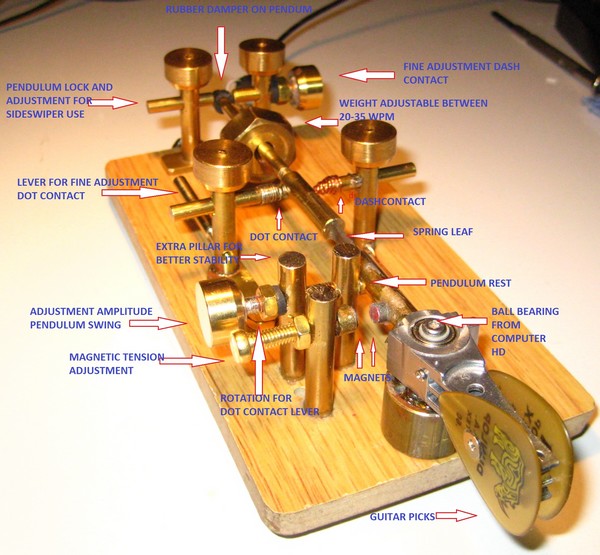 I made a few changes [December 2013]:
- I've made the pendulum lever more stable. Better joints at the spring leaf.
- This time I'm using magnet tension, which gives me a better adjustment range.
- For the swing amplitude I used a M4 bold and I also placed a second pillar for a better stability. Also easier to adjust.
- The dash contact is replaced.
- The dot contact has a certain sweet spot. I've made a gear for a fine adjustment of the dot contact. With a small lever I can rotate this gear.
- At the end of the pendulum I placed a small rubber damper.
- With a setscrew I can fine adjust the dash contact. Tension for this contact is the pendulum's spring leaf.
- With a locking pin, I can lock the pendulum more or less. This is done for Sideswiper use. The swing setscrew has to be loosened then.
- For the wiring I finally made contacts at the back side of the key.
[PA3BYW].
Video.
Homebrew Ultex Sideswiper.
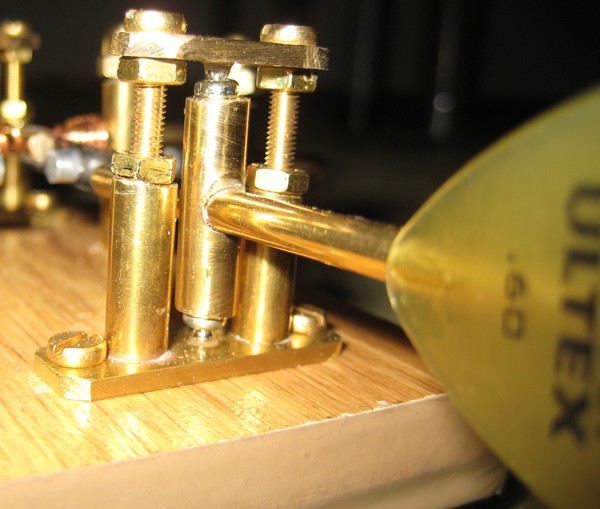
Hello Friends, hereby I want to present my latest sideswiper: the Ultex. In this design I used two pivots. One at the hand side and one at the end of the lever. I never saw a design like this and wanted to give it a try.
In the middle of the lever I used as a spring leaf which is actually a piece of baby hacksaw. Therefore, the lever nods in the middle. The two pivots are handmade. I used two small steel balls which were glued on the bearings top and bottom. In between there is a piece of brass rod. On the ends of the brass rods I mounted two small Phillips screws for the right center. With the adjusting screws I can adjust the bearing for the right friction. In the middle of the spring leaf I glued two small magnets. With two adjusting magnet I can set the desired tension.
The contact are hand wounded (coppered steel wire) and placed on the backside of the lever. The finger pieces are guitar picks as in all my keys.
[PA3BYW].
Video.
Homebrew Keycord Key.
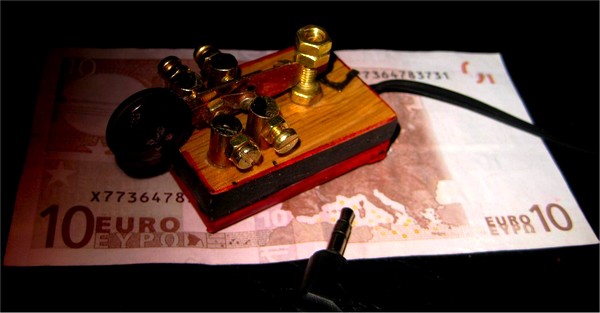 I have made a new key.. again.
This key is called the Keycord Key.
I want to use this key with my QRP radio's. The size is about the size of a matchbox. On the small lever I mounted a double set of contacts.
The ones in the front are stiff contacts for electronic keyer use. The contact gap is narrow for electronic key use.
The second contacts are flexible and are intended for sideswiper use. The gap between this contacts is a little wider.
When using the sideswiper mode the front contacts have to be loosened. In the back is a small handmade switch for sideswiper or el. key. The fingerpieces are shirt buttons which I got from my XYL's sewing box HI. They were glued together. On the bottom is a piece of Iron strip and 4 rubber feet. When using the el. key function the key is hardly moving. On sideswiper mode the key has to be hold with the left hand. I mostly use it on my knee for an armchair QSO..
The little key sends above expectations. I now attached 4 mini magnets on the bottom. This way the key can be secured on a metal surface.
BTW the material cost is much less than the shown ten Euro's note.
[PA3BYW].
Homebrew CootieWoogie (CW) Sideswiper.
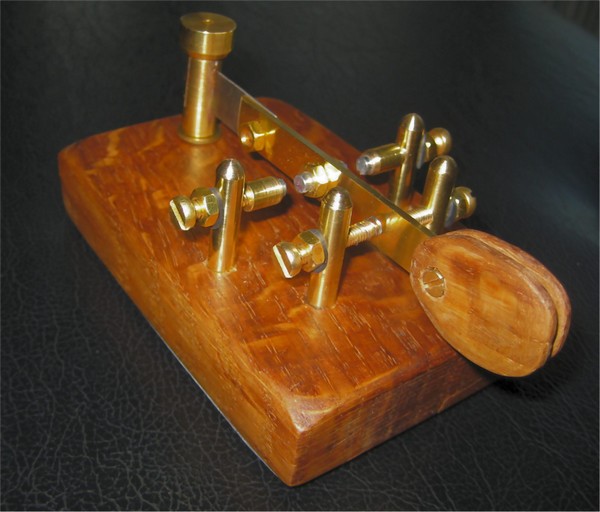 The base is oak wood which was polished with teak oil. Inside the base I mounted two strips of iron for a good weight.
All parts are brass. The finger pieces are homebrew and made of oak wood as well.
I used tension magnets.
On the backside I mounted a 3mm phone jack.
[PA3BYW].
Video.
Homebrew Legato Key.
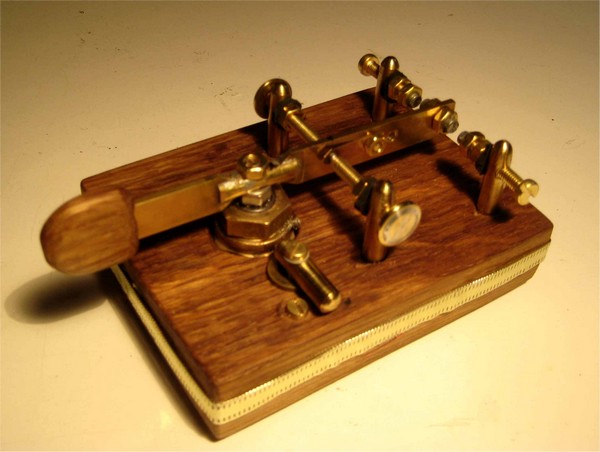 I've made a new key called "the Legato". This is a combi key again.
The base is made of oak wood. Inside the base there are two iron strips to get a little more weight. In the pivot I used a double ball bearing. At the end of the lever the tension can be adjusted with magnets.
The contacts are flexible contacts from my junk box.
The finger piece is also made of oak wood.
There is a homebrew switch for sideswiper or electronic key use. At the backside I mounted a 3mm chassis headphones connector. The key is decorated with a gold-colored strip.
[PA3BYW].
Video.
Homebrew CootieBug Deluxe.
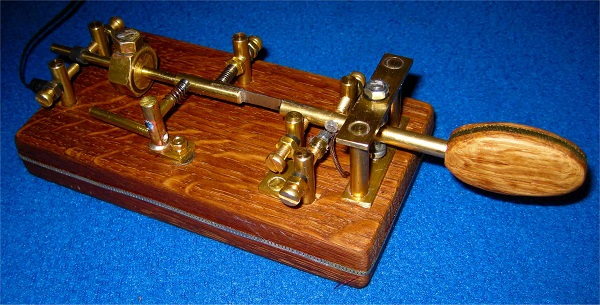 I'm proud to announce the birth of a new born key. It is born 22nd of may 2015. Place of birth: Mildam. Name: CootieBug deluxe.
The base is oak wood, filled with two iron strips for the desired weight.
All parts are brass except for the oak finger piece.
In the pivot there is a small steel ball at the base side and an adjusting pin at the top of the bridge.
The dot contact is placed beside the pendulum and can be adjusted with a turnable lever. There are two dash contacts, one rigid at the hand side and one flexible beside the pendulum. These contacts can be adjusted as desired. I like to have a little flexibility, so the flexible contact comes first then the rigid one.
There are two adjustable magnets for the return of the pendulum. The speed is adjustable from ~20-35 wpm.
Of course, the key is also suitable for cootie keying.
Well,let me explain how the key works. Important to know is that the steel pendulum blade acts as vibrating element (in bug mode) for the dots and also as a tension spring for the dash contacts. When I operate the cootie mode the pendulum blade has to act as a tension spring both for the left and the right motion. With the screws at the pendulum's end I block the movement at the end.
I don't want to have extra tension in the front, so I turn the magnet for less tension. Next thing to do is set back the setscrew for the pendulum's magnitude and also set back the rigid front dash contact. So the only contacts I use during Cootie mode are the two flexible contacts beside the pendulum.
About the adjusting mechanism of the dot contact:
it is really very simple. On a pin I've mounted a coil contact. My first spring was just a ball pen spring but that was too rigid, so now that is changed for another one. The pin and spring coil are mounted on a turnable mechanism which pivots near the contact. With a small lever of about 4 cm the dot adjustment can be set easily.
Hope my explanation is clear.
[PA3BYW].
Video.
Homebrew Compass Key.
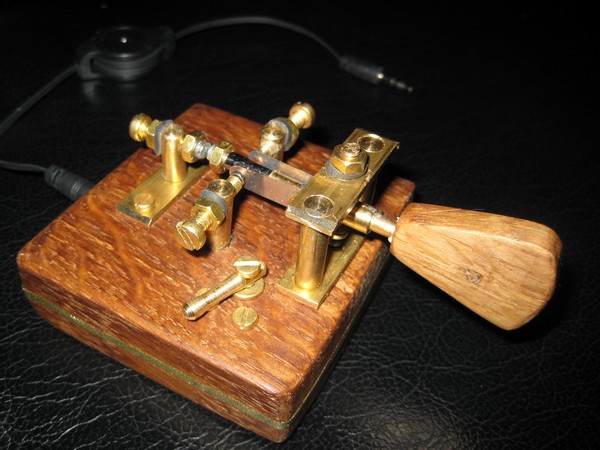 This key was designed to be used as a single paddle but I couldn't resist to make a switch for Cootie/ paddle use.
It was an ongoing process so to speak.
On the lever's end I've mounted a small magnet which is pulled by an adjustable magnet. This way the lever is pulled into a zero position. My first contacts were rigid, good for paddle use but now I've mounted flexible contacts on the lever. This provides a very smooth cootie feeling.
When using tension springs or push off magnets on the lever's sides the tension is magnified by moving the lever from it's centre position. But in this design tension stays equal or is even less when moving the lever from left to right.
The feeling is a little different from a 'hacksaw' type sideswiper but I got used to it very soon.
The lever pivots on two steel balls.
The finger piece and base are oak wood. On the sides there is a 'gold coloured' decoration ribbon.
For paddle use the contacts can be spaced very narrow. Even by blowing against the paddle a contact can be closed.
[PA3BYW].
Video.
Homebrew Windshield Wiper (WSW) Cootie.
Always trying new ideas...
Here's my new WSW cootie (Windshield Wiper Cootie).
These last weeks I had to change one of my car's windshield wipers. I discovered two steel strips in the old windshield wiper and the idea for this cootie was born.
The steel strips are very flexible, so I had to find out about the optimal distance between the post and the contacts.
So I first made an experimental cootie, just build with scrap from the junk box. The finger piece was made of two wooden shirt buttons...
The experimental key has a good action, so I decided to make another one. But now I wanted to have an adjustable flexibility. So I made a slider with a clamp (like the Maniflex sideswiper).
For the time being I'm using a coiled contact, mounted on the steel strip. I have to find out which contacts are the best for my way of keying. Don't like to have the contact directly on the steel strip.
[PA3BYW].
Homebrew Flex Cootie.
 There were a few idea's I wanted to give try.
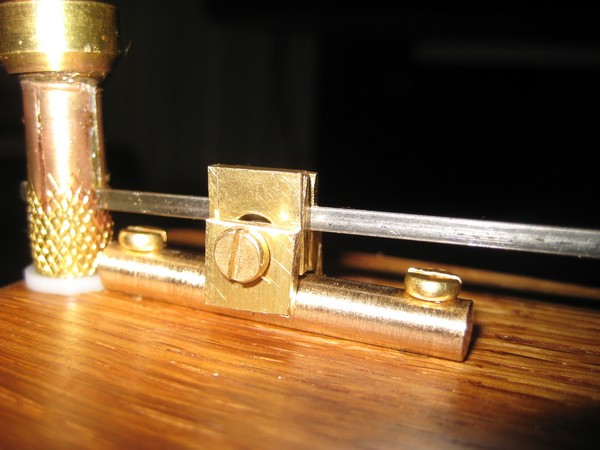
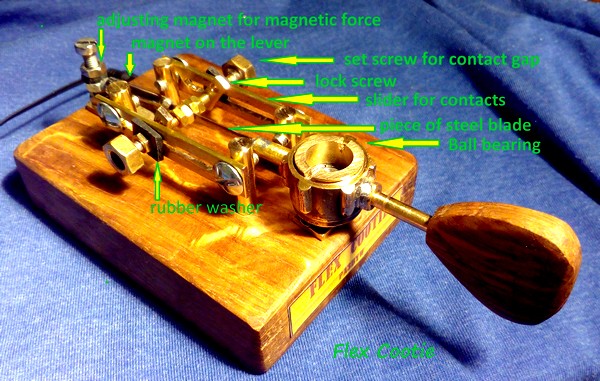
First of all, there is a ball bearing in the front which fitted inside a brass water pipe fitting. This bearing is mounted on a piece of brass strip with a threaded hole.
In the front section there is a piece of brass rod mounted on the pipe fitting. This is the lever for the h/b Oak hand piece.
In the middle section of the lever I've used a piece of steel blade which gives the key a certain flexibility.
At the end of the lever there is a small toy magnet which is pulled by an adjustable magnet glued on a 4 mm nut. By turning the magnet up and down the bolt, the magnetic force can be tuned.
Next to the lever there are two sliders for the contact screws. By moving these contacts from the front to the back, a 'sweet spot' can be found for the best action.
All was mounted on a Oak base. Inside the base there are two Iron strips for a good weight. On the back there is a 3mm jack connector.
See video below, part 1 and 2.
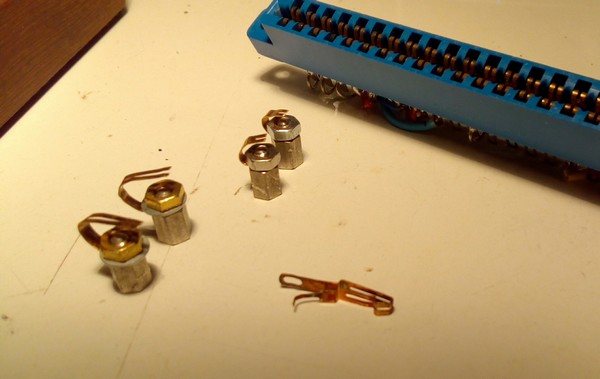
As I reported before: I'm using new soft contacts on my Flex cootie. I've made a few versions: from very soft, soft, a little soft. The contacts are gold plated and came from an old print connector. Works very fine. Contact space adjusting is done with the adjusting nut on the inside of the frame. A spring on the outside is keeping the contact adjusting nut in the right position. Sliding the contacts can determine a Sweet spot on the bending lever.
See video below, part 3.
[PA3BYW].
Video: Part 1.
Video: Part 2.
Video: Part 3.
Homebrew Lytske Cootie.
 About a month ago I had a nice QSO with our pal Miles, PA3CVV. He told me, he is going to move to a new apartment. He had to downsize his shack and offered me his TWanger sideswiper. No costs.. Think I have been sitting in my shack with my mouth opened for a while. Wow a TWanger?!..
Soon after that a parcel arrived and the nice shining sideswiper was unwrapped from the bubble wrap.
I connected it to the rig, adjusted it to my needs and made my first QSO. It felt if it has been my key all the time. So precise balanced.
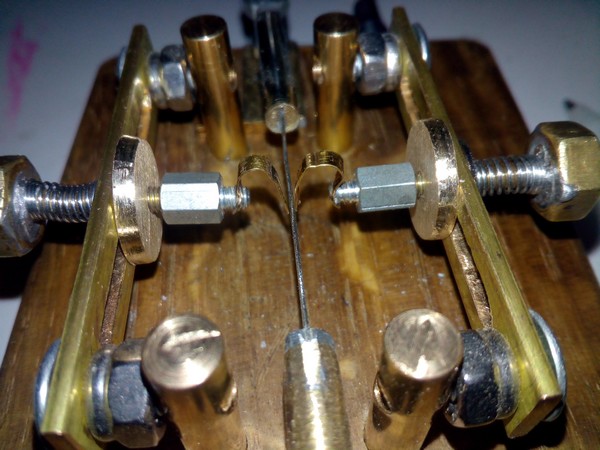
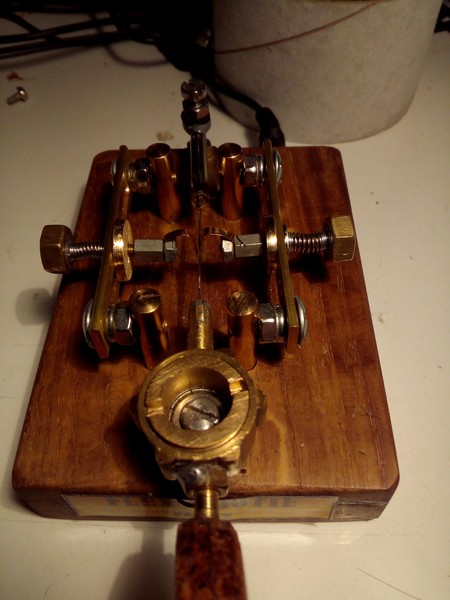
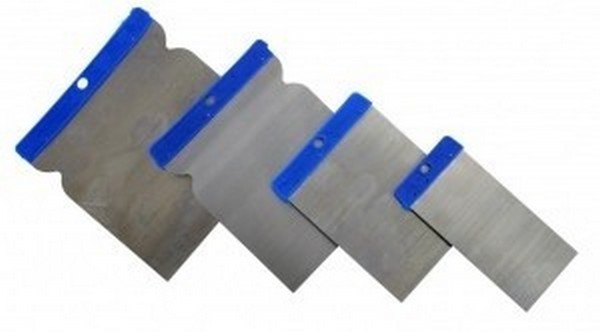
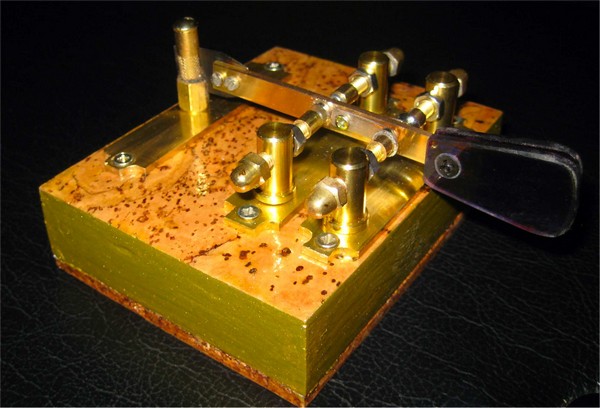
But you know, I always be a homebrewer. In my mind I wanted to make a key with the same dimensions. Of course I don't have the nice machines (and knowledge) to make a nice and heavy iron base like the TWanger's so I had to it my way. The base is wood, filled with two strips of iron, and covered with cork. The sides were painted with a gold paint and the cork layer with a transparent one. All parts are brass. The spring metal was cut with large scissors, from a putty knife, which was bought for about 1 euro at a cheap Action shop. That happened to have the same thickness as the TWanger's.
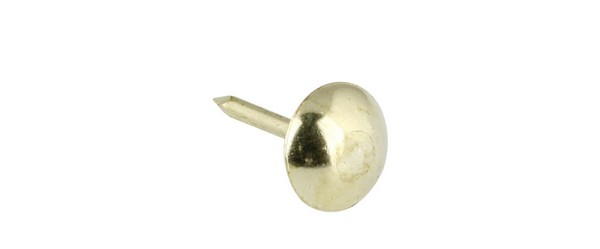
The flexible contacts came from a old relay and the steady contacts were made myself. I used the head of a brassed nail and soldered it on a small threaded brass pipe.
The lever dimensions are exactly the same as the TWanger's.
The distance between all elements (post-magnets, magnets-contacts) is the same as in Tom's (G3HGE) design.
The magnets are somewhat smaller but never mind, I like a light action anyway.
The end post is made from brass plug and modified to fit the spring steel. I covered it with another brassed nail.
I had to come up with a name and 'pet named' it "Lytske". That is the Frisian word for 'Petit'.
Of course the beauty of the TWanger is something I could never achieve but the action is about the same.
[PA3BYW].
